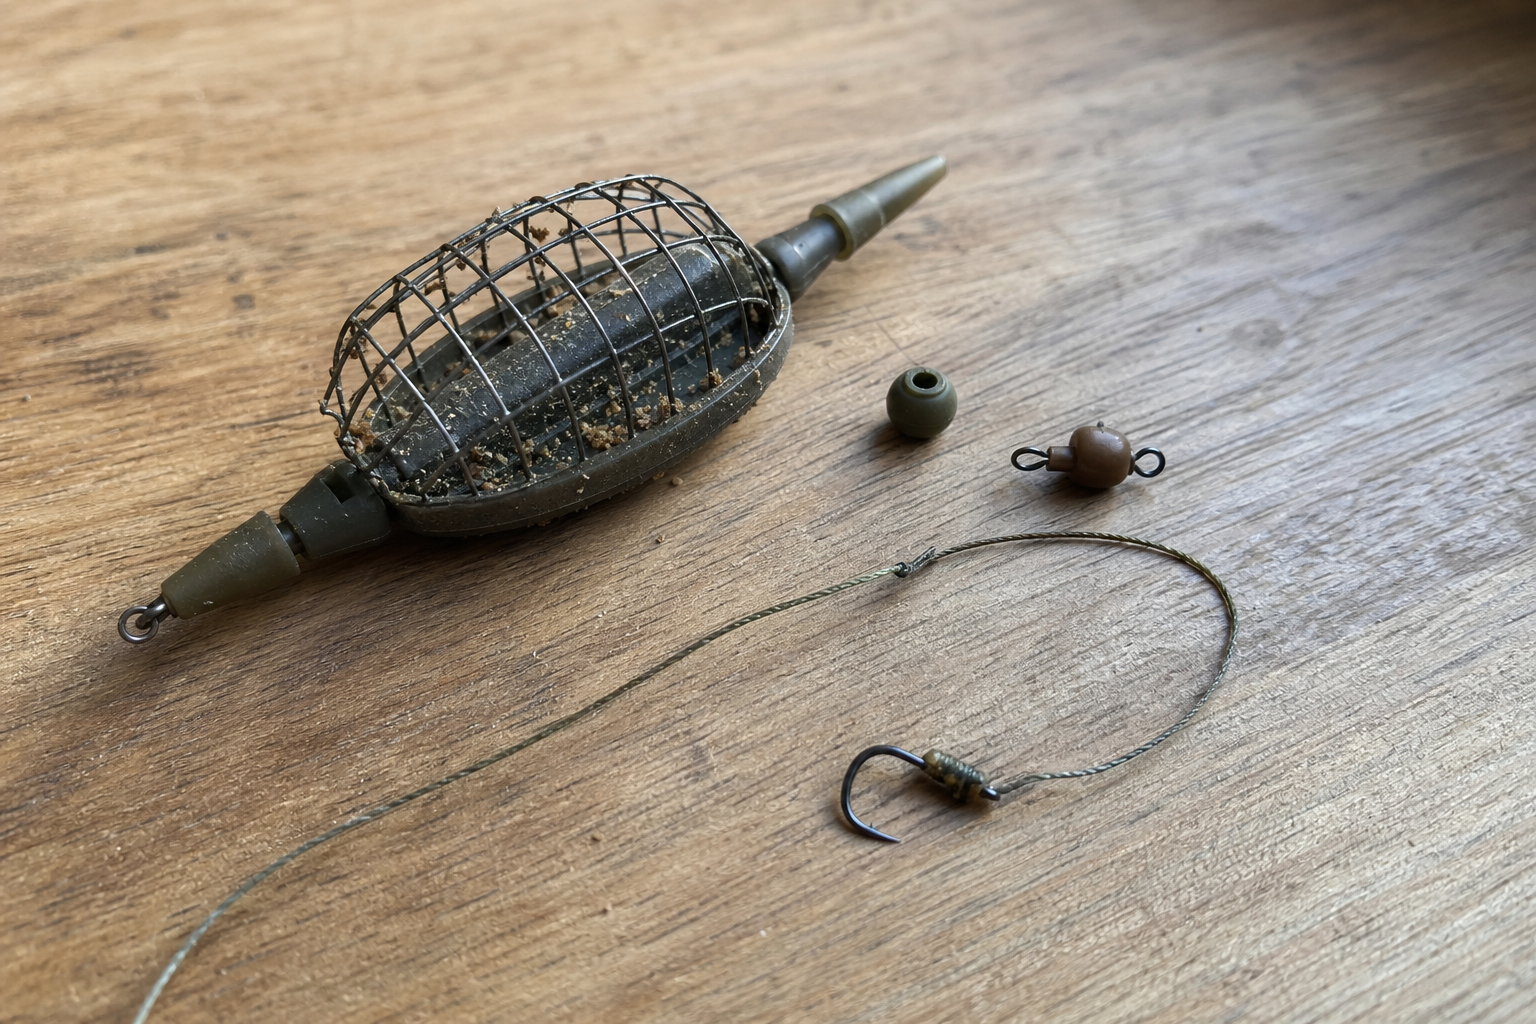
Method Feeder Fishing for Beginners: Setup, Casting and What to Expect
A practical beginner's guide to method feeder fishing covering rigs, loading feeders, accurate casting, bite detection and safe fish handling to build a producing swim.
At a Glance
- Method feeder fishing uses an inline feeder holding a compact feed ball with the hookbait tight to it to create a concentrated feeding spot.
- Key kit includes a 10–11 ft quivertip rod, 3000–4000 reel, 6–8 lb main line, 24–40 g flat inline feeder, buffer and quick-change beads, and a 3–4 inch hooklength.
- Load the mould with bait after placing the hookbait, press the feeder in firmly and check the ball holds shape with the bait visible or just proud of the surface.
- Cast accurately to the same spot, clip the line for consistent distance, watch the quivertip and strike on a clear pull round or steady curve.
- Be ready with a large net, damp mat and forceps. Keep the fish in the water until it recovers and follow fishery rules on welfare and legal requirements.
If you've done some float fishing and started noticing other anglers casting out a feeder rod, watching a quivertip and landing carp after carp from the same spot, method feeder fishing for beginners is probably your next logical step. The method feeder is a straightforward bottom-fishing approach that puts a ball of feed and your hookbait in exactly the same place on the lake bed. This article walks you through the rig, how to load it, where to cast on a small lake, what a bite looks like and how to handle a fish when you get one. Before you head out, you'll also need a current rod licence from the Environment Agency if you're fishing in England or Wales.
What the Method Feeder Actually Does
The idea behind the method feeder is simple. A small, flat, weighted feeder sits on the lake bed with a ball of groundbait or softened pellets packed around it. As that feed slowly breaks down in the water, it creates a tight, concentrated patch of attraction right where your hookbait is sitting. Fish that come to investigate find the hookbait immediately, rather than having to search for it.
This is quite different from float fishing, where the bait is suspended at a set depth and drifts with any movement in the water. It's also different from a cage or open-end feeder, which releases loose feed into the water column as it sinks. The method feeder keeps everything tight and on the bottom, which is exactly where carp and F1s spend most of their time feeding on small UK commercial fisheries. Those fish are often already conditioned to the sound of a feeder hitting the water and the smell of pellets breaking down. The method suits them particularly well.
One term you'll see on packaging and in guides is inline feeder. This simply means the mainline runs through the centre of the feeder itself, rather than being attached to a swivel or boom on the outside. It's the standard design for method feeder fishing and the type covered throughout this article.
What You Need for a Basic Method Feeder Setup
You don't need a lot of components to fish the method feeder. What you do need should all be compatible and properly matched to the size of water and fish you're targeting.
Rod and reel
A dedicated feeder rod of 10 to 11 ft with a sensitive quivertip is the right tool for most small UK lakes. Shorter rods are often easier to manage on a tight peg where space is limited. Look for a medium-action rod with a quivertip rated at 1 oz or 1.5 oz, which gives you enough sensitivity to see gentle takes while still having enough backbone to deal with a decent carp.
For the reel, a 3000 or 4000 size fixed-spool with a smooth drag is perfectly suitable. A baitrunner feature is useful if you intend to leave the rod in the rests, but it isn't essential when you're starting out. More detail on rod and reel specifications is available in the guides to feeder rods for beginners and choosing a reel for feeder fishing.
Main line, feeder and connector components
Six to eight pound monofilament is a reliable starting choice for most small-lake method feeder work. It has enough stretch to cushion sudden runs, it casts well and it's widely available. Some fisheries specify a minimum breaking strain in their rules, so it's worth checking before you go.
The inline method feeder itself should be flat-sided and typically between 24 and 40 g for a small stillwater. A lighter feeder in the 24 to 28 g range is often the better choice when you're casting short distances. It also allows the feed to break down a little more readily, which keeps fish interested in the swim.
Behind the feeder, you'll need a buffer bead (sometimes called a tail rubber). This sits between the feeder and your knot, protecting the line at that connection point and allowing the feeder to eject if a fish bolts close to the bank. Next comes a quick-change bead or swivel: a small connector that lets you swap hooklengths quickly without retying the main rig. Both components are inexpensive and usually sold in small packs alongside method feeders.
Hooklength and hook
A hooklength of 3 to 4 inches (roughly 7 to 10 cm) is the standard starting point for method feeder fishing. This is considerably shorter than a typical float rig hooklength, and deliberately so. The short length keeps your hookbait sitting right against the breaking-down feed ball, so a fish nosing through the mix finds the hook quickly.
The hook should be tied on a hair rig, meaning the bait is presented on a short loop of line extending from the bend of the hook rather than threaded directly onto it. This keeps the hook point clear and allows a wafter, pellet or piece of corn to sit naturally. A size 10 to 14 hook covers most situations on a small commercial. Pre-tied hooklengths with a hair rig and bait band or quickstop are widely available and work perfectly well for anyone starting out.
| Component | What it does | Typical spec for small UK lakes |
|---|---|---|
| Feeder rod | Detects bites via quivertip; absorbs runs | 10–11 ft, medium action, 1–1.5 oz tip |
| Fixed-spool reel | Holds line, manages drag on runs | Size 3000–4000, smooth drag |
| Main line | Connects rod to rig | 6–8 lb mono or light braid |
| Inline method feeder | Holds groundbait or pellet ball | 24–40 g, flat-sided inline type |
| Buffer bead | Protects knot; allows feeder to eject | Standard tail rubber or buffer bead |
| Quick-change bead | Fast hooklength swaps | Swivel or speed bead type |
| Hooklength | Presents hookbait tight to feed | 3–4 inches, 6–8 lb |
| Hook with hair rig | Holds bait without masking point | Size 10–14, tied on a hair |
Ready-made method feeder kits bundle most of these components together and are worth considering if you want to get everything matched up without shopping for individual items separately.
How to Set Up the Rig
The inline method feeder rig has only five components once the line is on the reel. Once you've assembled it a couple of times, you'll be doing it in under five minutes. The steps below follow the order the components sit on the line from the feeder end down to the hooklength.
Assembling a basic inline method feeder rig
Thread the mainline through the feeder
Pass your mainline through the centre channel of the inline method feeder from front to back, so the feeder can slide freely.
Add the buffer bead
Slide a buffer bead or tail rubber onto the line behind the feeder. This protects your knot and lets the feeder eject if a fish bolts close in.
Tie a small loop or swivel
Tie a small loop knot or attach a micro swivel to the end of the mainline. This is the connection point for the quick-change bead.
Attach the quick-change bead
Clip or thread the quick-change bead onto the loop or swivel. This allows you to swap hooklengths quickly during a session without retying the main rig.
Attach the hooklength
Clip a 3–4 inch pre-tied hooklength to the quick-change bead. Check that the hair rig and bait band or quickstop are intact before loading the feeder.
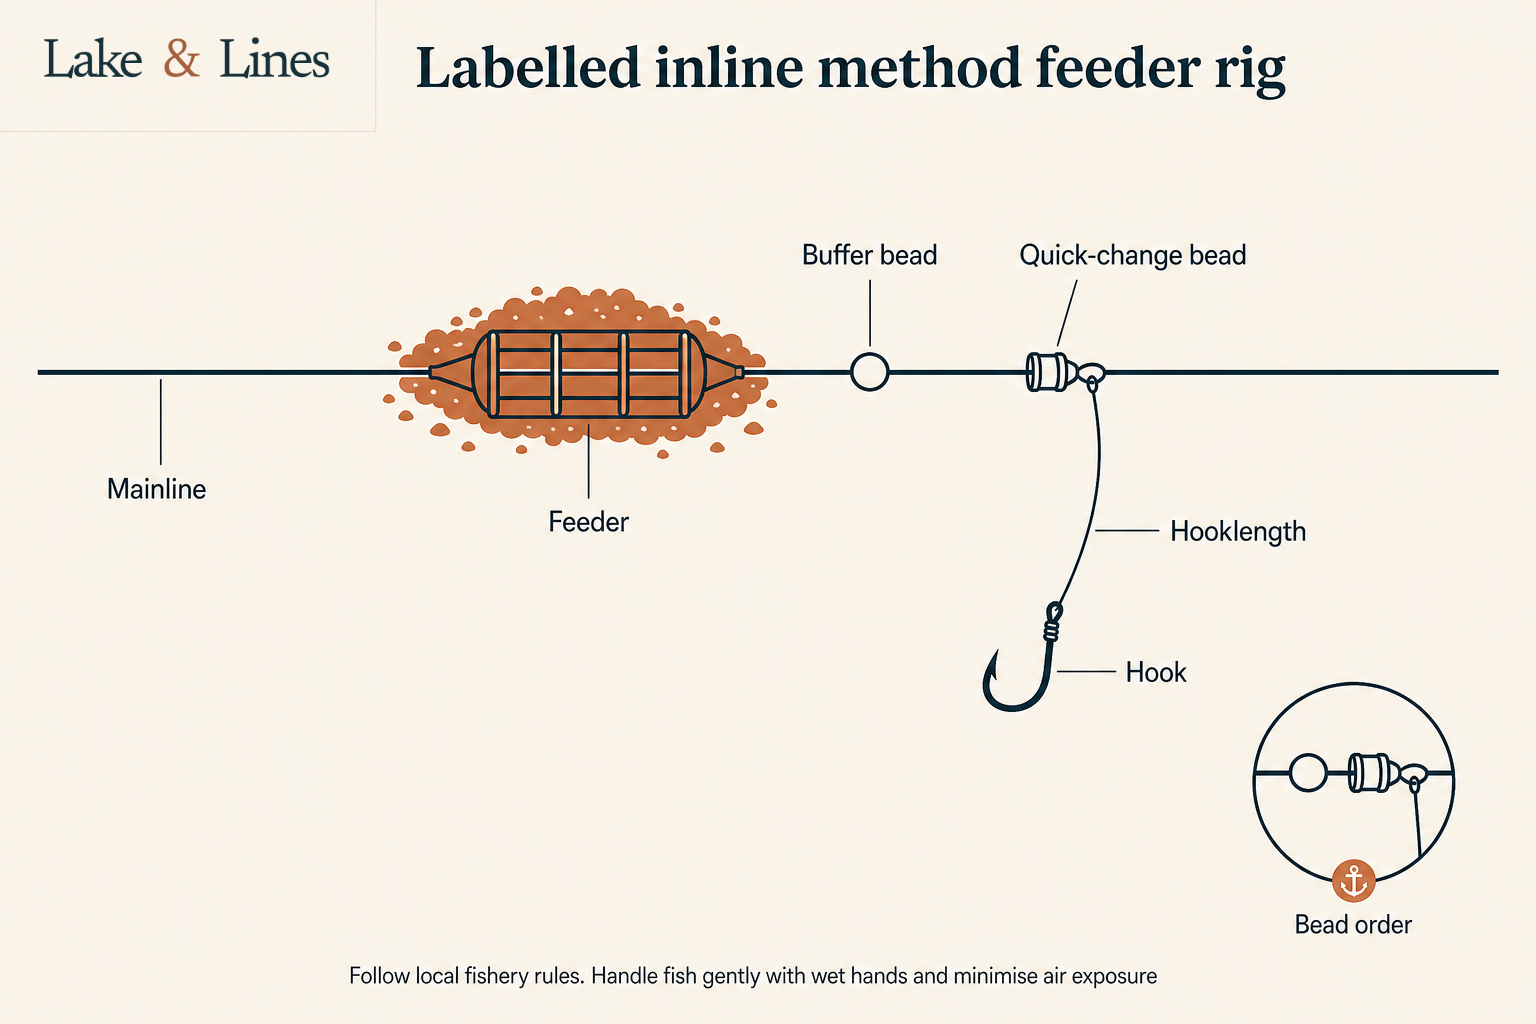
The diagram above shows how these components sit in relation to one another once the rig is assembled. One point worth paying attention to: the feeder must slide freely along the mainline between the front entry point and the buffer bead. It should not be locked in place. When a fish picks up the hookbait and moves off, the line pulls through the feeder, which means the angler feels the take on the quivertip before the fish feels the full weight of the feeder. That slight delay is what makes the rig so effective at producing confident, positive bites rather than tentative dips.
Bait and Loading the Feeder
Choosing your feed
There are two main feed options for beginners: a purpose-made sticky method mix groundbait, or softened micro pellets. Both are straightforward to prepare and widely available from tackle shops.
Micro pellets are often the simpler starting point. Soak them in water for around 15 to 20 minutes, drain off the excess, and they are ready to use. They bind together well when pressed and break down gradually on the bottom without going mushy too quickly. Method mix groundbait requires water added a little at a time until the consistency is right, which takes slightly more practice to judge. Either way, the key is getting the mix to the right dampness.
The squeeze test is the simplest way to check: squeeze a handful of your prepared feed firmly in your fist, then open your hand slowly. It should hold its shape without crumbling, but it should not feel slimy or leave wet residue on your palm. If it falls apart, add a small amount of water and mix again. If it feels too sticky, leave it to absorb for a couple of minutes before using it. Hookbait options such as wafters, banded pellets and corn are covered in more depth in the guide to choosing bait and hookbaits for method feeder fishing.
Loading the mould
A feeder mould is a plastic press shaped to fit the feeder. You press the mix into it around the feeder to create a neat, compact ball of feed. Most method feeder kits include a mould, and they're inexpensive to buy separately if yours didn't come with one.
Loading the method feeder
Place the hookbait in the mould first
Put your hookbait (wafter, pellet or corn) into the indentation at the bottom of the mould before adding any feed. This positions it correctly when the feeder is pressed in.
Fill the mould with damp feed
Spoon or press damp groundbait or softened pellets into the mould on top of the hookbait, filling it to the rim.
Press the feeder firmly into the mould
Push the feeder down into the filled mould with steady pressure. Twist slightly if needed to compact the feed into a firm, rounded ball.
Remove cleanly and check
Lift the feeder out of the mould. The feed ball should be compact and hold its shape. The hooklength should hang clear of the ball. If the hookbait is buried too deep, adjust the mould position slightly next cast.
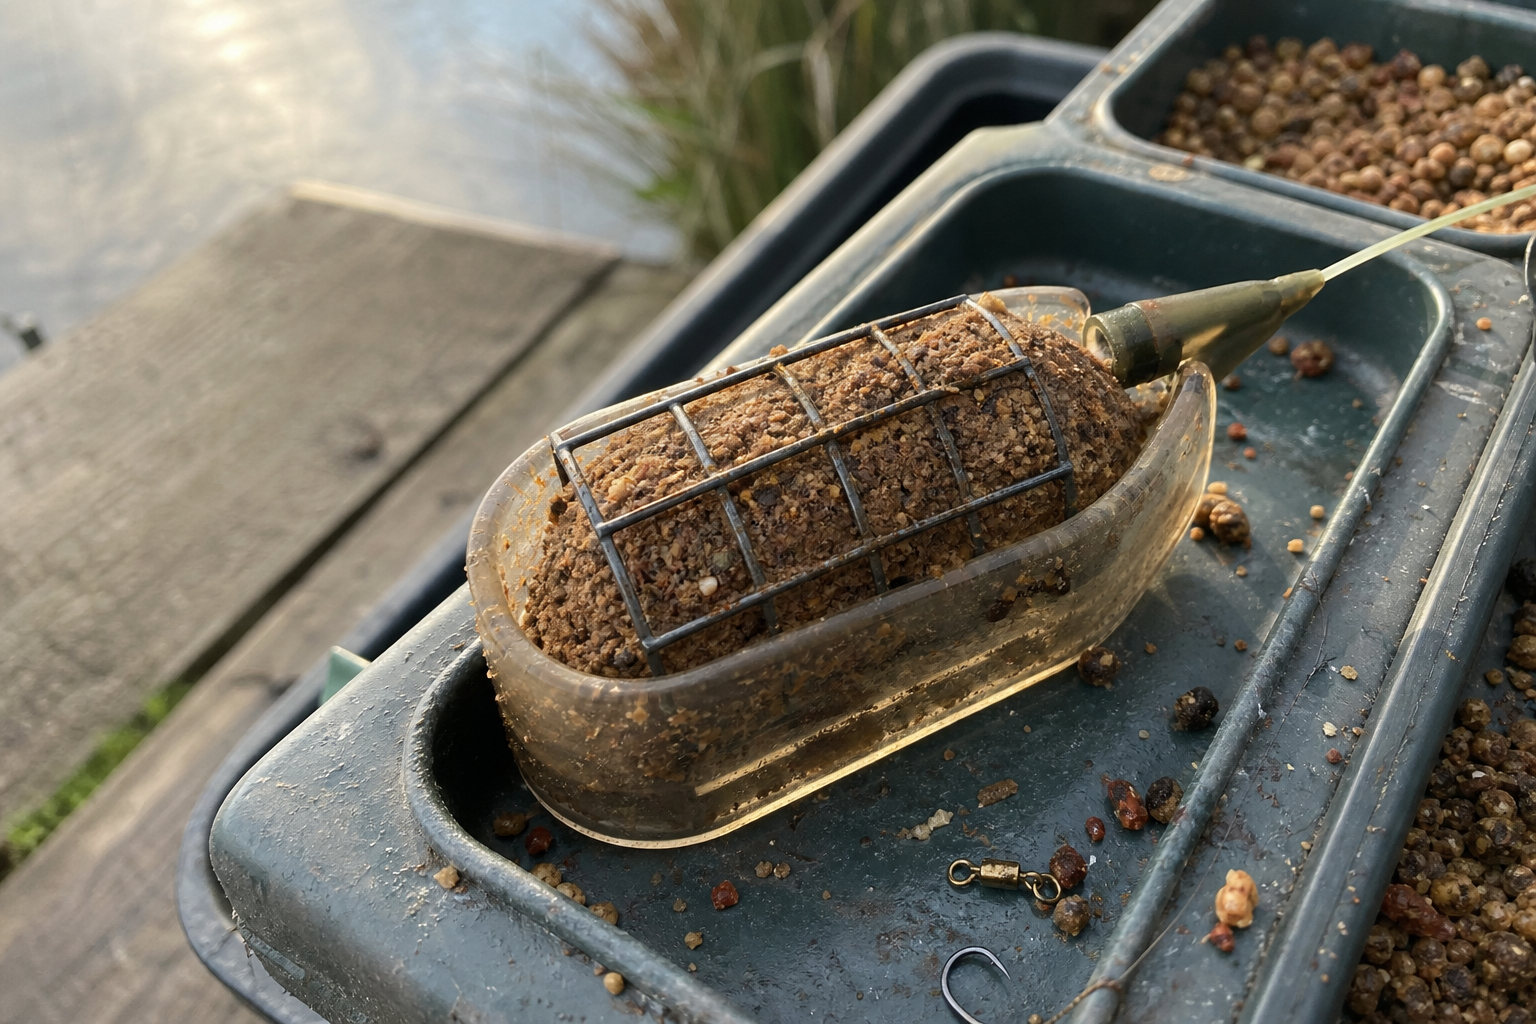
The hookbait can either sit just inside the surface of the feed ball or just outside it. Burying a wafter slightly so it settles into the breaking-down feed is a common approach. Leaving a banded pellet just proud of the ball also works well and can give a very natural presentation. If bites aren't coming, try adjusting the hookbait position before changing anything else.
Mix consistency check
Squeeze a small handful of feed in your fist. Open your hand slowly. It should hold its shape without crumbling but must not feel slimy or wet. If it falls apart, add a small splash of water and mix again. If it leaves residue on your palm, leave it to absorb for a few minutes first.
Where and How to Cast on a Small Lake
Casting to a visible feature like an island or far-bank margin is straightforward enough. The harder question for many beginners is where to put the feeder on a small, featureless lake where there's no obvious target. The answer is more reassuring than you might expect.
On a small commercial or club pond, fish move around the entire water and will come to a well-fed spot wherever it is. If you are unsure where to start, cast roughly two-thirds of the way across the water from your peg. That puts you into open water away from the bank margins where other anglers may be fishing, and often puts you over a slightly deeper area of the lake bed where fish are comfortable feeding.
Once you have made your first cast and the line has settled, clip the line into the line clip on the side of your reel. Every subsequent cast can then be released smoothly and allowed to pull up to the clip as the feeder lands, locking in the distance precisely. Accurate, repeated casting to the same spot matters far more than casting far. The method feeder works by building a small, concentrated feeding area on the bottom. That only happens if every feeder goes in the same place.
Using a line clip for accuracy
After your first cast, press the line into the clip on the side of your reel spool. On each cast after that, release smoothly and let the line pull tight to the clip as the feeder lands. This locks your casting distance and puts every feeder in the same spot.
On very small waters, use a lighter feeder (around 24 g) and a slightly smaller ball of feed per cast. Overfeeding a compact swim can switch fish off rather than attracting them, particularly in warm weather when fish are already feeding cautiously.
Bite Detection and What to Do When a Fish Takes
After casting and tightening the line down gently to the feeder, place the rod in the rests and watch the quivertip. Keep the rod tip low and give the line a gentle pull so the tip is loaded slightly. That way, any movement by a fish pulling the hookbait is transferred directly to the tip.
Method feeder bites on commercial fisheries are usually decisive. You'll see either a sharp pull-round of the quivertip or a slow, steady curve that keeps developing. Strike on either. Lift the rod firmly and smoothly to set the hook, then keep the rod bent and let the drag do its work if the fish runs.
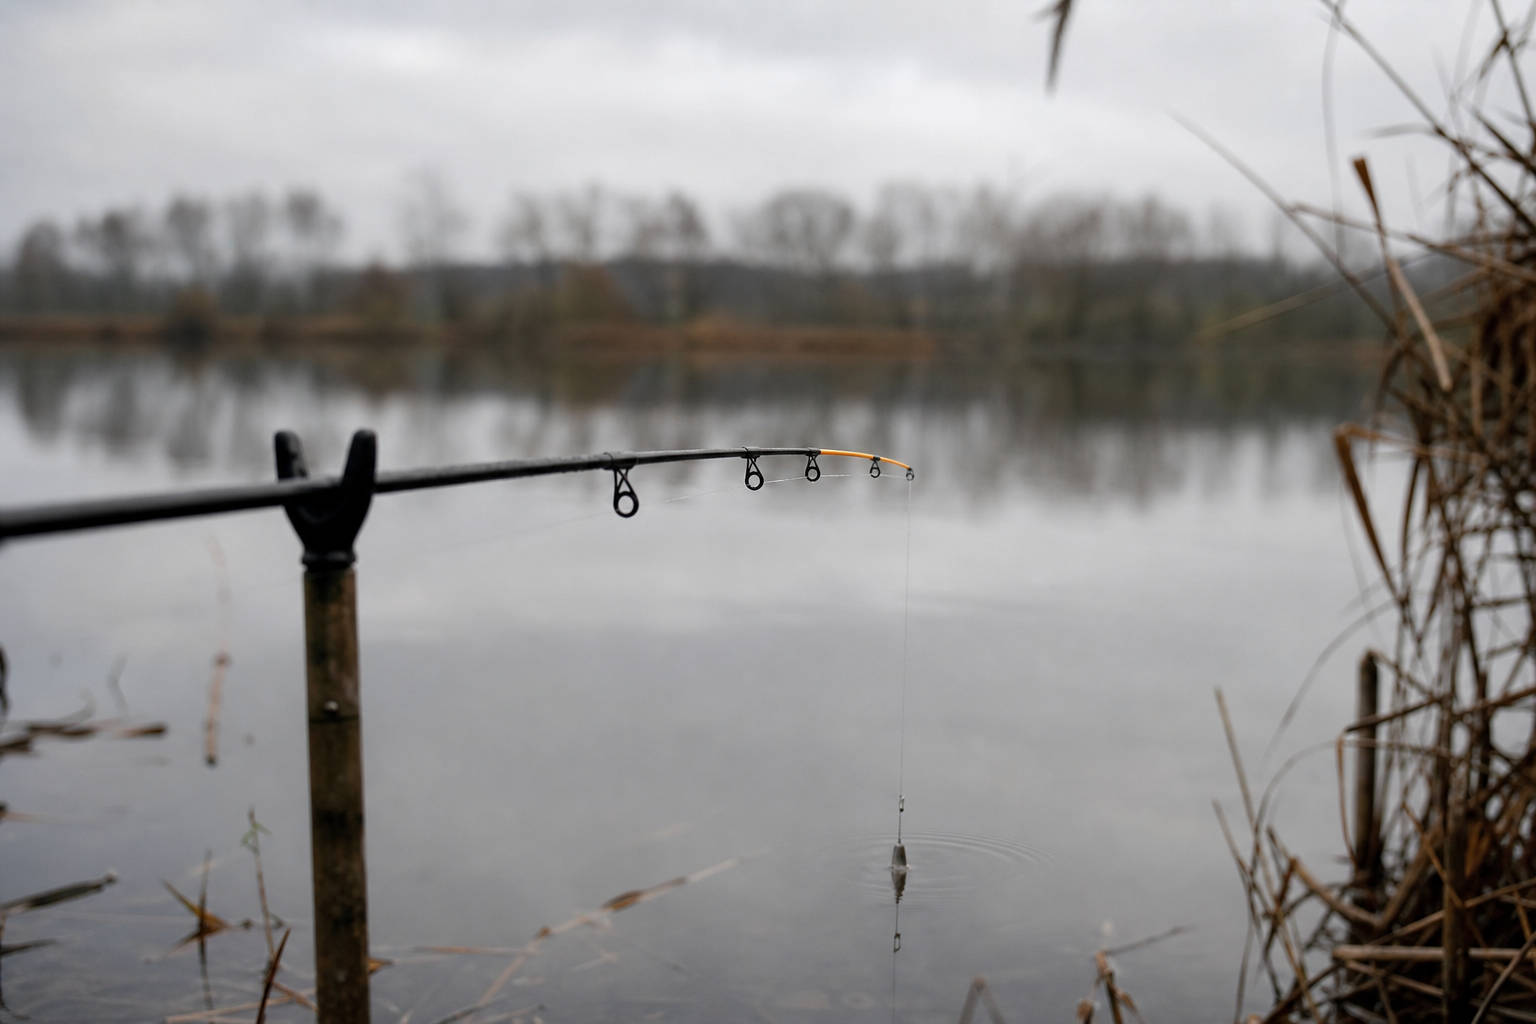
Do not be tempted to twitch or move the feeder after casting. Leaving it still is the right approach. If nothing has happened after around 10 minutes, reel in, reload the feeder and recast to the same spot. Recasting refreshes the feed ball and puts a new hookbait in position, which is often enough to prompt an immediate response.
As the session develops and fish begin arriving in the swim, you may find that recasting every five to eight minutes keeps them competing and the bites coming regularly. Match your recast timing to how quickly bites are arriving rather than following a fixed schedule.
You'll also notice occasional small twitches of the quivertip that don't develop into a proper take. These are line bites, caused by fish moving through the swim and brushing the line rather than picking up the hookbait. They're a sign that fish are present. Leave the rig in place and wait for a proper pull-round.
Fish Care at the Net
Getting the fish in safely is the point where preparation pays off. Before you make your first cast, take a minute to set things up properly.
Use a landing net large enough for the fish you expect. On a commercial fishery targeting carp, a 36-inch net with knotless mesh is appropriate. Many fisheries specify a minimum net size in their rules, so check these before you arrive. Lay your unhooking mat flat and close to the water's edge within your peg, and dampen it before use.
When a fish is ready to be netted, keep the net in the water and draw the fish over it rather than scooping at the fish. Once it is in the net, lift everything onto the dampened mat. Wet your hands before touching the fish and keep it over the mat at all times.
The short hooklength of the method feeder rig means the hook is usually well-placed and straightforward to see. Remove it calmly with forceps or a disgorger if your fingers can't reach it comfortably. Clip forceps to your jacket before you start fishing so they're always within reach.
Most commercial fisheries require all coarse fish, including carp, to be returned alive, and in England and Wales you may not remove fish from a stillwater or canal without the owner's permission, so treat returning every fish as the rule. Hold the fish gently upright in the water at the net's edge until it has recovered its balance and swims away under its own power before releasing your grip. More detailed guidance on unhooking and returning fish safely is available in the guide to unhooking coarse fish safely.
Quick welfare check before you cast
Landing net in the water or within reach. Unhooking mat laid flat and dampened. Forceps clipped to your jacket. These three steps take under a minute and mean you are ready the moment a fish takes.
Troubleshooting Common Problems
Most problems during a first method feeder session come down to mix consistency, hooklength length or casting. The table below covers the situations you're most likely to encounter and what to do about them.
| What's happening | Likely cause | What to try |
|---|---|---|
| Feed falling off in the air | Mix too dry | Add a small amount of water; re-do the squeeze test |
| Feed not breaking down on the bottom | Mix too wet or over-compressed | Use slightly drier mix; press less firmly in the mould |
| Hooklength wrapping around feeder | Hooklength too long or tangling on release | Shorten hooklength to 3 inches; check bead connection is secure |
| Missing bites on the quivertip | Striking too early or hooklength too long | Wait for a definite pull-round; try shortening to 3 inches |
| No bites after 20 minutes | Fish not yet in the swim or wrong spot | Recast; try a slightly different angle; consider moving to a different peg |
| Line bites but no proper takes | Fish present but cautious | Try leaving hookbait just outside the feed ball; reduce feed volume slightly |
The setup described in this article is enough to get started. Your first session is really about getting familiar with loading the feeder, casting accurately to the same spot and learning to read the quivertip rather than targeting a big net of fish. The more consistently you can put the feed in one place and keep fresh bait on the hook, the more quickly that swim will start producing. From there, adjusting your bait and hookbait choices is a natural next step, as is looking more closely at which rod and reel will suit your regular fishing best.
Frequently asked questions
What is method feeder fishing and how does it work?
Method feeder fishing places a compact ball of feed around a flat inline feeder on the lake bed with your hookbait sitting tight to it. As the feed breaks down it attracts fish to the exact spot where the bait is, producing confident bottom takes.
What gear do I need to get started?
A 10 to 11 ft feeder rod with a sensitive quivertip, a 3000 or 4000 fixed spool reel, 6 to 8 lb main line, a 24 to 40 g flat inline method feeder, buffer and quick-change beads, a 3 to 4 inch hooklength and a size 10 to 14 hook on a hair rig.
How should I load the feeder so the bait presents correctly?
Place the bait in the mould first, fill with damp method mix or softened micro pellets, press the feeder firmly into the mould and lift it out. The feed ball should hold shape and the hookbait should hang clear or sit just proud of the ball.
What does a bite look like and when should I strike?
Typical bites are a sharp pull round of the quivertip or a developing steady curve. Strike on either one with a firm, smooth lift to set the hook and then keep the rod bent while letting the drag work.
How do I land and release carp safely?
Use a large knotless net and a dampened unhooking mat. Keep the net in the water when drawing the fish over it, wet your hands, remove the hook with forceps and return the fish upright to the water to recover before release.

Lake & Lines Editorial Team
Editorial team
The Lake & Lines editorial team brings together freshwater fishing guides and researched tackle advice, helping beginners and returning anglers prepare for better days by the water.